Archived from the original dev blog and left as it was written, so it reflects the game as it stood in 2008.
Firstly apologies for the late post but as Brawl was released Sunday I’m sure you can forgive the delay as I needed to teach all my friends to fear Yoshi again. But I digress this week I’m taking a page from the MC Hammer rather than the Valve one.
This week is all about the work you should be doing before you even open Hammer once. Now to be clear I’m saying “should” not “need to do” sometimes I don’t even do the prep work myself but on the whole it helps and “should” be done. This topic could cover a hundred blogs itself so I may revisit in the future and may be a little light on some of the details today.
First were going to address the important questions when dealing with anything; who, what, when, where why, and how. Making a map without knowing what you’re making will result in either a terrible disaster or a flash of inspiration that will probably need you to restart the map anyway. Whether it’s a game play idea like fighting off a horde of enemies, or a location idea like a roof top area, or even a storyline idea like painting a tragic hero you need to know what it is you’re trying to map. To take an example I knew what I was going to be mapping for BM first was Bounce, the dm level.
Once you have that basic idea you then sit down and expand on any of the questions you didn’t answer with the original concept. Figure out who your player is what he’s doing, how he’s going to get it done. A level should be planned front to back before Hammer is opened, with multiplayer maps that means sketching it out, with single player maps that means having points notes of the story and everything that’s supposed to happen to the player. In my case with bounce I already had the layout and that was the one thing I was going to change very little, but there were problems that needed addressing.
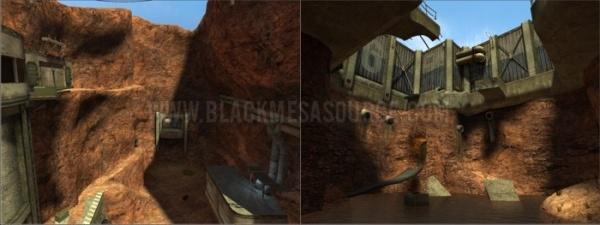
Once you have the expanded idea and are thinking about Hammer, stop and go back to your notes. You should be doing what I call “Rationalizing”. Make it make sense, for example when I started work on Bounce I sat down and said “What the ****!” Everywhere I looked bounce made no sense. It was just a collection of passageways looped around a recycled part of the tram ride with a couple of bounce pads thrown in to mix it up. So how did I explain it, quite simply really it was a water collection and distribution facility from before the dam was built for BMRF. The wall in the center? It separates the area where water is collected from where water is pumped out of. The room above the wall? That controls the gate inside the wall. The high ledge with a ladder? That leads to a control room built into the cliff overlooking the canyon. The wide pipe leading to the pool room? The main flow from the collection areas. The pool area? An open air collection area to collect surface run off and water from several other collection sites. The rubble in the pool area? The pool is topped by a walkway area that has some collapsed pieces. The tall thin room? Sewer access and drainage for several incoming pipes. The thin pipe from the tall room back to the main area? No longer a pipe, instead a flow monitoring station that’s quite cramped inside. The ledge with the rocket launcher? Now an overpass to allow incoming road traffic. You look at the layout and its barley an inch different, all the thematic changes with very few material differences in the floor plan, and that’s what I mean by “Rationalizing”. It makes sense now but I barley changed a thing and explained a million reasons for detail and made the map something more than a collection of interesting cliffs. Rationalizing doesn’t mean scrapping your idea because its outlandish, just how to bend it to common logic so it feels more real.
So with all this talk about what I’ve changed in bounce I feel its only fair to give you a little teaser shot of what the level looks like, of course this is still a WIP so nothings final.